

In the journey of creating a budget-friendly fishing boat setup, you’ll discover the ups and downs of thrifty choices and clever finds. After nabbing a boat for $900 and a trailer for $1,500, the next essential piece was power. The quest led to a surprising decision: purchasing the most affordable trolling motor from Bass Pro Shops for $159.
As the story unfolds, the experience of unboxing, installing, and testing the motor comes to life. You’ll find out whether this inexpensive choice paid off, along with insights into using a homemade lithium battery. Join the adventure as you explore the real-world implications of finding budget-friendly solutions in fishing gear.
Building a Budget Fishing Boat: A Comprehensive Guide to My Trolling Motor Experience

Overview of the Purchase
Reason for Choosing the Cheapest Motor
When it comes to building a budget-friendly fishing setup, choices often align closely with your wallet’s voice. You needed a trolling motor, and with the entire boat build costing around $3,000, each penny counts. The $159 trolling motor from Bass Pro Shops stood out as the cheapest option available. It was an invitation to explore the lower end of the market, and you were curious if it could perform to your expectations.
Budget Constraints and Priorities
Budget constraints often dictate choices in DIY projects, especially with something as comprehensive as a fishing rig. You’ve already invested in a boat for $900 and a trailer for $1,500, leaving you needing the trolling motor to complete the setup without overspending. Your priority was to find a motor that could deliver functionality while keeping the overall budget intact. Sacrificing some features for affordability seemed like a reasonable trade-off, especially for an initial investment.
Initial Impressions of the Motor
Upon first glancing at the trolling motor, you were struck by its simplicity. It didn’t flaunt any flashy features, but the design was straightforward and functional. Everything from the build quality to the design exuded a sense of no-nonsense utility. You couldn’t help but wonder if this simple motor could stand up to more expensive competitors. Your expectations were tempered, but curiosity was piqued.
Unboxing the Trolling Motor
Packaging and Contents
As you opened the box, you were greeted by efficient packaging that secured the motor and accessories well. Everything seemed as streamline as the motor itself. The unboxing experience felt gratifying, giving you a peek into what you were working with and setting the stage for what was to come.
First Impressions
Your first look at the trolling motor confirmed that it was indeed no frills, but it felt sturdy enough. The materials didn’t scream premium, but they appeared adequate for light use. It sparked your eagerness to install and see how it would perform on the water.
Included Accessories and Features
Inside the box, you found essential components such as the mount, propeller, and a user manual. A few basic tools were even included, which you appreciated. The motor promised an array of speed settings, which would be crucial for adjusting to different fishing conditions. Overall, it seemed to cover the basics effectively.
Installation Process
Tools Required for Installation
For the installation, you would require a few common tools. A drill, some screws, and basic hand tools like wrenches and pliers were all you needed. You made sure to gather everything beforehand so you wouldn’t waste any time during the setup.
Step-by-Step Installation Guide
- Prepare the Mount: Securely attach the motor mount to the transom of your boat using screws and the drill.
- Attach the Motor: Slide the motor into the mounted bracket and tighten all necessary knobs and screws.
- Connect the Wiring: Install the battery leads according to the wire color-coded instructions in the manual.
- Test the Fit: Ensure everything is tight and secure before attempting to use the motor.
Common Challenges Faced
While the installation process was relatively straightforward, one challenge you bumped into was ensuring a tight fit on the transom. The motor felt a bit wobblier than you’d prefer, making you wonder if it could handle rough water conditions. This was a concern but not a deal-breaker—it was part of the learning curve.
Testing the Motor
Setup of the Homemade Lithium Battery
Testing the motor involved first setting up your homemade lithium battery. This was an exciting project in its own right. You felt proud as you wired it up, ensuring everything was organized and secure. A reliable energy source is essential, especially when you’re planning to spend hours on the water.
Initial Performance Testing on Land
You took the motor for a quick spin on land, and the initial performance was promising. The response was acceptable, and you could tell the motor packed enough power to get your boat moving. You made mental notes of how it handled various speed settings, excited about what was to come once you hit the water.
Durability and Build Quality Assessment
As you assessed the build quality, you kept a close eye on how well it held together under varying conditions. The plastic construction seemed less durable than higher-priced alternatives, so you had lingering doubts about its longevity. However, it felt sturdy enough for occasional recreational use.

First Fishing Trip Experience
Setting Off on the Water
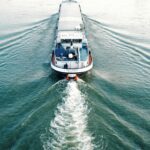
Finally, the big day arrived when you could take the motor out on your freshly designed fishing rig. The moment you cast off, the excitement was palpable. You couldn’t help but feel hopeful. You navigated to your favorite spot, eager to see how this budget motor would perform under real conditions.
Real-World Performance under Load
Once under load, the motor exceeded your expectations for its price point. It moved efficiently through the water, maintaining a steady speed despite a slightly rougher lake. You started to believe that perhaps you hadn’t made such a huge mistake after all.
Comparing to Higher-Priced Alternatives
During your outing, thoughts turned to more expensive motors. You didn’t quite get the same impressive acceleration and durability, sure, but this motor provided a surprisingly good experience given its price. In many aspects, it was a good reminder that budget options could still meet practical needs.
Pros and Cons of the Motor
Advantages of Budget-Friendly Options
The most significant advantage was the considerable cost savings. For someone deeply invested in building an entire boat setup, each dollar saved makes a difference. Additionally, the motor was lightweight, making it easy to handle and install.
Disadvantages Faced During Use
However, there were some drawbacks you couldn’t ignore. The build quality felt a bit flimsy, making you apprehensive about long-term durability. Performance couldn’t rival higher-priced motors when it came to more demanding conditions, especially over extended periods.
Overall Value Assessment
Overall, the trolling motor provided decent value for what it cost. For casual fishing trips, it would likely serve its purpose well. But if you had ambitions for serious fishing days or rough water conditions, you might want to consider investing more in a higher-end motor.

Lessons Learned from the Purchase
Evaluating the Importance of Quality vs. Price
This experience taught you that while budget options can be viable, there is often a trade-off between quality and price. You learned firsthand that it’s important to think about how often you’ll use the motor and in what conditions.
Impact of Budget Constraints on Performance
Navigating budget constraints can impact performance in tangible ways. You understood that each piece of this fishing rig affects the overall experience. Deciding to prioritize one component over another could lead to disappointment if performance expectations are too high.
Advice for Future Buyers
Your advice for future buyers is to weigh needs against wants carefully. While seeking deals is vital, sometimes it bubbles down to understanding long-term goals. If fishing is a frequent hobby, consider that investing more upfront could save money in the long run.
Community Feedback
Comments from Viewers and Followers
Once your experience was shared with your community, feedback started pouring in. Many expressed curiosity, while others offered praises and shares of their own budget finds—creating an excellent dialogue about affordable fishing gear.
Comparative Experiences Shared by Others
Viewers also shared their own stories of budget motors, ranging from triumphs to horror stories of their less fortunate purchases. It was comforting to realize that you weren’t alone in navigating the tricky waters of affordable fishing equipment.
Suggestions for Other Budget Motors
Several followers proposed alternative motors to consider next time or if you were looking to upgrade. This sharing of insights helped generate a collective resource for those optimizing their setups on a budget.

Future Plans for the Boat Setup
Next Steps in the Build Series
Following this experience, your plans for the boat are coming together beautifully. The next steps involve looking at upgrades to improve both the rig’s performance and comfort levels. More modifications feel promising, including adding storage solutions or enhancing the fishing platform.
Intended Upgrades or Modifications
You’re particularly interested in upgrading the motor for long-term use while improving comfort with an enhanced seating arrangement. Additionally, exploring options like fish finders or better storage to accommodate your gear could amplify the fishing experience significantly.
Plans for Future Fishing Trips
You can’t wait for future fishing trips! With lessons learned and insights gained, you feel better prepared to make informed choices. Each outing will certainly enhance not only your skills but your appreciation for budget fishing setups.
Conclusion
Final Thoughts on the Purchase Experience
Reflecting on the purchase experience, it’s been a learning journey filled with anticipation. You went from skepticism about the motor’s capabilities to finding moments of joy while using it on the water. Every aspect of this build has added to your excitement for budget DIY projects.
Would I Recommend the Motor to Others?
While you wouldn’t recommend it for serious anglers or in demanding conditions, you would suggest it for casual users. If you’re on a tight budget and need a simple, functional solution, this trolling motor may well fit the bill.
Reflections on Budget Fishing and DIY Projects
In the grand scheme of things, budget fishing offers a unique blend of challenge and creativity. These projects encourage resourcefulness and creativity, proving that connecting with nature doesn’t have to cost a fortune. Each experience builds confidence along the way, and who knows what exciting adventures await you next?
I’m building a full fishing boat setup using only Facebook Marketplace and budget finds.
In Part 1, I found a boat for $900. In Part 2, a brand new galvanized trailer for $1500.
Today in Part 3… I needed power.
So I bought the cheapest trolling motor Bass Pro Shops had in stock. $159.
Did it work? Did I make a mistake?
Watch as I unbox it, install it, test my homemade lithium battery—and take it fishing.
🎣 Boat Build Series Playlist: [Coming soon]
🛶 Watch Part 1 (The Boat): • I Found a Unicorn on Facebook Marketplace
🚚 Watch Part 2 (The Trailer): • $1,500 Trailer for My $900 Boat — Was It a…
🔔 Subscribe and follow along as we build a full fishing rig for under $3,000.
May God bless you and your families.
Thank you for supporting our Channel through the below affiliate links. No price increase for you but we may receive compensation.
-Amazon – our store –
-Merch –
-EcoFlow –
-Premier Body Armor –
-My Patriot Supply –
-GoDark Bags –
-Vertx – -Amsoil –
-Refuge medical – Code is STAR –
Jk Boots –
-Become A Wranglerstar Member For Exclusive Content and Perks / @wranglerstar