
So you find yourself out on a boat, enjoying a relaxing day on the water, when suddenly someone falls and gets injured. Panic sets in, but you quickly realize that you need to take action. But how exactly does one perform basic first aid on a boat? In this article, we will explore the essential steps and techniques that can help you provide immediate medical care while on a boat, ensuring the safety and well-being of everyone onboard. From treating minor cuts and burns to administering CPR, discover how you can be prepared for any unexpected medical emergencies that may arise during your boating adventures.
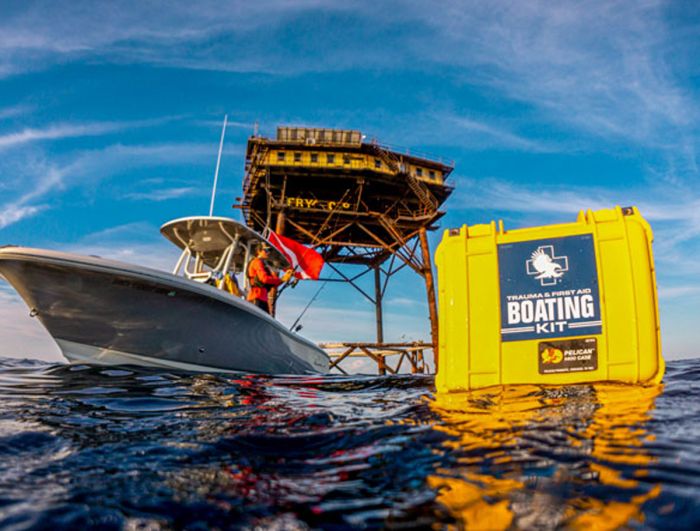
First Aid Kit on a Boat
Importance of a First Aid Kit
When you’re out on a boat, having a well-stocked first aid kit is of utmost importance. You never know when accidents or injuries might occur, and being prepared can make all the difference in ensuring the safety and well-being of everyone on board. A first aid kit serves as your go-to resource for immediate medical assistance until professional help arrives, especially when you’re far away from land or medical facilities.
Essential Items in a First Aid Kit
A properly stocked first aid kit is a must-have on any boat. So, what should be included in your kit? Here are some essential items:
- Bandages: Various sizes of adhesive bandages, sterile gauze pads, and adhesive tape to dress and protect wounds.
- Antiseptic solutions: Alcohol wipes or antiseptic liquid to clean and disinfect wounds to prevent infection.
- Scissors and tweezers: These tools can come in handy for cutting tape or clothing, and for removing splinters or foreign objects.
- Disposable gloves: Protect yourself and others from contamination by wearing disposable gloves when providing first aid.
- Pain relievers: Non-prescription pain relievers, such as acetaminophen or ibuprofen, to alleviate pain and reduce inflammation.
- Cold packs: Instant cold packs or gel packs to provide quick relief for sprains, strains, and swelling.
- CPR mask: A CPR mask with a one-way valve to aid in performing CPR and protect the responder.
- Emergency blanket: A compact and lightweight emergency blanket to keep someone warm and prevent hypothermia.
- First aid manual: An up-to-date first aid manual with instructions for performing basic first aid procedures.
These items are just the basics, and you can add more specific items based on your knowledge and the needs of your passengers. It’s also important to regularly check and restock your first aid kit to ensure everything is up to date and in good condition.
Assessing the Situation
Remaining Calm
In any emergency situation, it’s crucial to stay calm and composed. Panicking can hinder your ability to think clearly and act efficiently, putting yourself and others at risk. Take a deep breath and try to assess the situation calmly. Remember, you’re more likely to effectively administer first aid if you remain calm and focused.
Checking for Hazards
Before providing first aid, it’s essential to ensure your safety and the safety of the injured person. Assess the surroundings for any potential hazards that may pose a threat to you or the patient. Hazards on a boat can include slippery surfaces, sharp objects, or fuel spills. Take the necessary precautions to eliminate or minimize these hazards to prevent further injury.
Identifying Potential Injuries
Once you have ensured the immediate safety of the scene, it’s time to assess the injured person for potential injuries. Look for any visible signs of trauma, such as bleeding, burns, fractures, or dislocations. Ask the person if they are experiencing any specific pain or discomfort. This initial assessment will help you prioritize and provide appropriate first aid.
Calling for Help
Marine Emergency Services
In serious or life-threatening emergencies, it’s crucial to call for professional medical help. Marine emergency services, such as the Coast Guard or local harbor authorities, are specially equipped to handle emergencies on the water. Use your boat’s VHF or marine radio to contact the nearest emergency services and provide them with accurate information about the situation, location, and number of injured individuals.
Using a Boat Radio
Every boat should be equipped with a VHF radio to communicate with other vessels and marine authorities. Familiarize yourself with operating the radio efficiently to make distress calls or seek assistance. Make sure you understand the proper procedures for using emergency channels and have a clear understanding of mayday and pan-pan distress calls.
Satellite Communication Devices
In remote areas or situations where VHF communication is not possible, satellite communication devices can be a lifesaver. Personal locator beacons (PLBs) or satellite phones allow you to send distress signals and communicate with rescue teams from anywhere in the world. These devices are crucial for maintaining constant contact and requesting assistance in emergency situations.
Performing CPR
Determining the Need for CPR
In some emergencies, performing CPR (cardiopulmonary resuscitation) may be necessary to sustain someone’s life until professional help arrives. Check if the person is unresponsive and not breathing or gasping for air. If these signs are present, immediate CPR intervention is required to restore blood circulation and promote oxygenation.
Basic Steps of CPR
Performing CPR on a boat may present additional challenges due to limited space and instability. Remember to ensure the safety of yourself and the patient during the process. Follow these basic steps of CPR:
- Ensure a firm and stable surface: Provide a stable surface for the patient before starting CPR. Clear the area and lay the person on a flat and stable surface if available.
- Check responsiveness and call for help: Assess the person’s responsiveness and shout for nearby assistance. Call emergency services and let them know about the situation.
- Start chest compressions: Position yourself by placing the heel of one hand at the center of the person’s chest, on the lower half of the breastbone. Place your other hand on top and interlock your fingers. Compress the chest at a rate of 100-120 compressions per minute, with a depth of at least 2 inches.
- Give rescue breaths: After 30 compressions, tilt the person’s head slightly backward and lift the chin to open the airway. Pinch the person’s nose shut, and provide two rescue breaths into their mouth, watching for visible chest rise.
- Repeat cycles: Continue performing cycles of 30 compressions and two rescue breaths until professional help arrives, or the person shows signs of life.
Remember, CPR techniques may slightly vary based on updated guidelines, so it’s important to stay updated on the latest recommendations.
Controlling Bleeding
Direct Pressure
Bleeding is a common occurrence in accidents and can range from minor cuts to severe wounds. Applying direct pressure is the first step in controlling bleeding. To do this, place a clean cloth or sterile gauze directly over the wound and apply firm pressure using your hand. Maintain pressure until the bleeding stops or professional help arrives.
Elevation
Elevating the injured area that is bleeding can help reduce blood flow and aid in controlling the bleeding. If possible, raise the injured limb above the level of the heart. This method is particularly effective for extremity injuries, such as bleeding from a cut finger or toe.
Tourniquet as a Last Resort
A tourniquet should only be used as a last resort when bleeding cannot be controlled by direct pressure or elevation. Applying a tourniquet is a serious measure that restricts blood flow to a specific area, and it should only be used in life-threatening situations. Ensure you have proper training and knowledge to apply a tourniquet correctly to avoid further complications.
Treating Burns
First-Degree Burns
First-degree burns are considered minor burns and typically affect the outermost layer of the skin. The skin may appear red and painful, but blisters are usually absent. To treat a first-degree burn on a boat, follow these steps:
- Cool the burn: Immediately place the burned area under cool running water for 10-20 minutes to minimize damage and relieve pain.
- Apply a burn ointment or cream: Once cooled, apply a thin layer of over-the-counter burn ointment or aloe vera gel to soothe the burn and promote healing.
- Cover the burn: Use a sterile non-stick dressing or a clean cloth to cover the burn. Avoid using adhesive bandages directly on the burn.
Second-Degree Burns
Second-degree burns are more severe and involve the layers beneath the outermost layer of the skin. These burns may present with blisters, severe pain, and possible swelling. To treat a second-degree burn on a boat, take the following steps:
- Cool the burn: Similar to first-degree burns, immediately place the burned area under cool running water for 10-20 minutes.
- Protect the burn: Cover the burn loosely with a sterile non-stick dressing or a clean cloth to protect it from infection.
- Seek medical attention: Since second-degree burns can be more serious, it’s advisable to seek medical attention to assess the extent of the injury and explore appropriate treatment options.
Third-Degree Burns
Third-degree burns are the most severe and involve all layers of the skin, potentially damaging underlying tissues, muscles, and bones. These burns may appear charred or white, and the person may experience intense pain or no pain at all due to nerve damage. Treating third-degree burns on a boat is beyond the scope of basic first aid. In such cases, it’s crucial to contact emergency services immediately for professional medical assistance.
Handling Fractures and Dislocations
Stabilizing the Injury
Fractures and dislocations can occur on a boat due to accidents or falls. When faced with such an injury, stabilizing the affected area is essential to prevent further damage or pain. Follow these steps to stabilize fractures and dislocations:
- Immobilize the area: If it’s obvious that a bone is fractured or a joint is dislocated, keep the affected area as still as possible to prevent unnecessary movement.
- Support with cushions or splints: Use cushions, pillows, or rolled-up clothing to support and cushion the injured limb or joint.
- Apply ice (if available): If ice or a cold pack is available, place it over a cloth or towel on the injured area to help reduce pain, swelling, and inflammation.
- Seek professional medical help: Fractures and dislocations require specialized medical attention for proper examination, evaluation, and treatment. Make arrangements to transport the injured person to a medical facility for further care.
Immobilizing the Limb
To immobilize a fractured limb on a boat, you can use improvised splints or materials readily available on board:
- Use wooden boards or paddles: If possible, use sturdy wooden boards or paddles to create a rigid splint on either side of the fractured limb. Secure the splint by tying it in place with bandages or cloth strips.
- Padding is important: Place soft materials, such as clothing or cushioning pads, between the splint and the injured area to provide comfort and minimize movement.
- Secure the splint: Attach the splint firmly but not too tight. Ensure circulation to the limb is not compromised by monitoring the person’s skin color, temperature, and pulse.
Improvisation may be necessary in a boating emergency, so it’s important to think creatively and use available resources to provide the necessary support and stability for the injured person.
Dealing with Drowning
Rescue Techniques
Drowning is a critical situation that requires immediate action to prevent loss of life. If someone is drowning, follow these rescue techniques:
- Reach, throw, but don’t go: If the person is within reach, extend a pole, rope, or any long object for them to hold onto. Do not jump into the water yourself as it could put you both in danger.
- Throw a flotation device: If the person is beyond reach, throw a lifebuoy, life ring, or any floating object that can help keep them afloat until further assistance is available.
- Secure the person on board: Once you have successfully rescued the drowning person, bring them on board using proper techniques to avoid further injury or complications.
- Follow CPR steps: If the person is unresponsive and not breathing, immediately start CPR as previously mentioned.
Clearing Airway and Performing CPR
Rescuing a drowning victim often requires clearing the airway and performing CPR. To clear the airway:
- Place the person on their back: Position the person on their back on a flat and stable surface.
- Tilt the head and lift the chin: Gently tilt the person’s head slightly backward and lift their chin up to open the airway.
- Remove any foreign objects: If you see any obvious foreign objects or water in the person’s mouth, remove them by gently sweeping with your finger or a cloth.
- Give rescue breaths: Pinch the person’s nose closed and provide two rescue breaths into their mouth, watching for visible chest rise.
Monitoring Vital Signs
Once the person is successfully rescued and breathing, it’s important to monitor their vital signs while waiting for professional help. Pay attention to their breathing rate, pulse, and level of consciousness. Maintain their body temperature to prevent hypothermia and provide reassurance and comfort to help reduce anxiety until advanced medical care is available.
Managing Sea Sickness
Preventing and Treating Sea Sickness
Sea sickness can quickly turn a pleasant boat trip into a miserable experience. If you or someone on board is prone to sea sickness, these tips can help prevent and alleviate the symptoms:
- Position yourself wisely: Stand or sit near the center of the boat where motion is the least noticeable.
- Focus on the horizon: Fixing your gaze on the stable horizon can help reorient your brain and reduce feelings of nausea.
- Stay hydrated: Drink plenty of fluids to avoid dehydration, which can worsen sea sickness. Avoid alcohol, as it can exacerbate symptoms.
- Fresh air and ventilation: Stay in an area with fresh air and good ventilation to reduce feelings of nausea and avoid strong odors.
- Over-the-counter medications: Consider taking over-the-counter medications specifically designed to alleviate sea sickness, such as antihistamines. Follow the instructions carefully and be aware of any potential side effects.
It’s important to note that different individuals may respond differently to various preventive measures or medications. It may require some trial and error to find the most effective strategy for preventing and managing sea sickness.
Handling Hypothermia
Recognizing Symptoms of Hypothermia
Hypothermia, a dangerous decrease in body temperature, can occur when exposed to cold water or prolonged exposure to cold weather conditions on a boat. It’s crucial to recognize the early signs of hypothermia to take prompt action. Symptoms of hypothermia include:
- Shivering and cold sensation: The body’s natural response to hypothermia is shivering as it attempts to generate heat.
- Numbness or loss of dexterity: As hypothermia progresses, individuals may lose coordination and motor skills due to decreased blood flow to extremities.
- Confusion and drowsiness: Hypothermia affects mental clarity, leading to confusion, slowed thinking, and drowsiness.
- Loss of consciousness: In severe cases, hypothermia may lead to loss of consciousness, which can be life-threatening.
Providing Warmth and Re-warming Techniques
If someone on your boat is experiencing symptoms of hypothermia, provide immediate warmth and follow these re-warming techniques:
- Move indoors or find shelter: Seek shelter from the cold and move the person indoors, if possible, to protect them from further heat loss.
- Remove wet clothing: Wet clothing exacerbates heat loss, so remove any wet garments and replace them with dry clothing or blankets.
- Insulate and cover the person: Cover the person with blankets or sleeping bags to provide insulation and keep them warm.
- Provide warmth through body-to-body contact: If necessary, share body heat by huddling close to the person or having someone else lie alongside them.
While these re-warming techniques can provide initial care, it’s essential to seek medical attention for individuals with hypothermia, as their condition may require further evaluation and treatment.
In conclusion, having a well-prepared first aid kit and the knowledge of basic first aid techniques are vital when you’re on a boat. Remember to assess the situation, remain calm, and check for hazards before providing any assistance. When necessary, call for professional help using marine emergency services or satellite communication devices. Understanding how to perform CPR, control bleeding, treat burns, handle fractures and dislocations, deal with drowning, manage sea sickness, and handle hypothermia equips you with the skills needed to respond effectively to emergencies on a boat. Stay safe, be prepared, and enjoy your time on the water responsibly!